
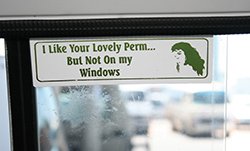
The greasy old dry perm. Putting you in trouble with your taxi driver for as long as you can remember.
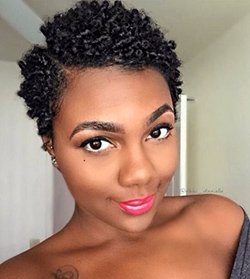
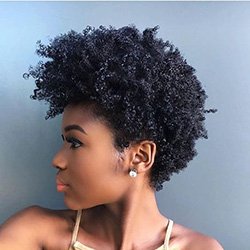
There’s nothing quite like the coils and curls that the classic dry perm offers. Isn’t it great to know that you can get it this style without the grease?
The coolest part about rocking a dry perm is that you can do it, even if you’ve dyed your natural hair. It’s not a chemical process, so you can experiment with the Ultra Gloss range and experience colour as well as care.
A dry perm is a way to upgrade your natural hair with well-defined curls, and no one can say no to that.
List of dry perm must-haves:
- Sulphate-free shampoo
- Leave-in conditioner
- Perm rods
- Coconut oil (or another oil of your choice)
- Curl definition cream
- Plastic cap/shower cap
- Hair dryer (or if you’re at a salon a hooded dryer)
- Oil sheen spray
Step 1: Treat your hair like you care
Clean hair means bouncy curls that are full of volume. So, make sure that your hair is washed and conditioned before you start. When you’re done, use the rods on soaking wet hair, to ensure that it sets well.
Coils are life!
The LOC method has never been more important than it is right now. If you’re not sure what we’re on about, let’s school you quickly.
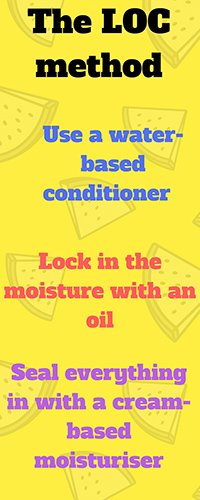
This method is not only great for keeping your hair moisturised, but it also makes the dry-perming process a lot easier.
Step 2: Twirl with leave-in conditioner
Gather a small section and twirl it around a perm rod. Twirl the hair strand in-between your fingers, then twirl it around a rod. To help with drying, ensure that there are a few centimeters between each section. Make sure that you twirl until you get to the ends of your hair.
When you do the twirling make sure you roll it right. Roll the back section, down, the top part forward, and the sides towards your face.
Take your time, and work through your hair section by section. Ensure that you cover all of your hair strands using your chosen leave-in conditioner. To ensure that your curls don’t unravel, add a little more conditioner to the ends.
Once you’ve pretty much circled your head with billions of rods (depending on the thickness of your hair) it’s time for the important wait. Make sure you’re prepared. It’s best to clear your diary because you’ll have to wait for a while for the best results. The longer you wait the more defined your curls will be.
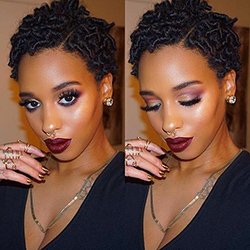
You don’t have to separate the curls to look awesome.
When it comes to drying your hair, you can go do so in these two ways:
- Hooded Dryer
This is a slightly quicker method. You would need to sit under a dryer for at least 2 hours (or use a handheld one). Now you have plenty of time to watch as many Instagram stories as your data can handle.
- Overnight drying
In this case, you’ll need to spend at least half an hour under the hooded dryer or a handheld one. The next step would be to sleep in the perm rods overnight (it might be a little uncomfortable, but we suffer for beauty anyway).
Now it’s time for the fun part – taking the rods out. Be sure to test the waters first. Start by coating your fingers with an oil of your choice to prevent frizz. Reveal your new hairstyle by carefully removing the rods, before separating the curls. Ensure that all the wet areas are completely dry before you start manipulating the curls.
Step 3: Separate and unravel with an oil
Now that your hair is dry, you’re ready to unravel your coily awesomeness. If you’re going for a big curl afro, separate each section three times. If you want a longer-lasting style then separate each section once or twice. This will give your curls a chance to separate as the days go by.
Over time your curls will unravel bit by bit, but they’ll still be gorgeous.
Step 4: Lock in the style with a cream
You can now bring on the heavy cream (ensure that it has shea butter) for ultimate curl definition and then you can style as you like. There you have it. You did it! You have curls to show off and there weren’t any strange chemicals involved. Now go and rock them with pride.
One thought on “Dry perm your natural hair”